


The Professionals at Wella have been extremely busy as usual coming up with new ideas and breaking the mould of Couture Colour. We also take a closer look at the NEW Oil Reflections Range and their Elements hair care and EIMI styling heroes of the moment.


 Everyone loved the original Oil Reflections Oil so much that Wella decided to develop an Entire Range to compliment it. The New Wella Professionals Oil Reflections will immerse you with a multi-sensorial experience - for results you can SEE, TOUCH and SENSE. Featuring a special blend of Macadamia seed oil, Avocado oil and Vitamin E, known for its natural anti-oxidant properties, this oil instantly reveals the beautiful reflections of your hair colour. This lightweight oil technology conditions the hair and smoothes it to make it feel incredibly light and supple. Ingredients include macadamia seed oil which is used especially for skincare due to its high anti-oxidative virtues, avocado oil is leveraged for its nourishing elements, and Vitamin E, is known for its natural anti-oxidant properties. Now you can try the whole newly formulated regime which includes a shampoo, conditioner and a mask, as well as the original Reflections Oil.


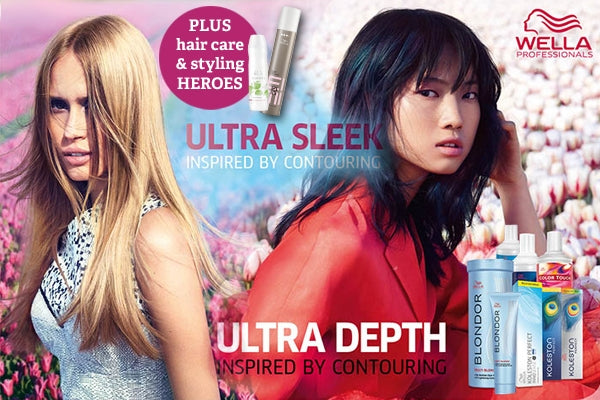
1. Inspired by Contouring: Ultra Depth
Wanting a look with 'Ultra-Depth,' Wella created this cool dissonance of youth and a daring shaggy style.
A freehand cut with very long and textured layers combined with a see-through soft fringe just touching the eyebrows contours the face to bring her enticing "premium innocence" alive. A cool panel of petrol colours over a slimming volcanic black are placed throughout the top of her head to create the illusion of soft movement and structure.
Cut
Step 1
Razor cut from mid-lengths to ends to create texture and define the shape. Work section by section on dry hair.Step 2
Cut a long and narrow round fringe, starting at the bridge of the nose going down to the cheekbones on each side. Texturize the fringe with a slicing technique. This will enable you to remove some weight and create a see-through effect.Step 3
Contour the face and personalise the entire cut by texturizing with the slicing technique and using the texturizing scissors when needed. Work this way until you reach the desired texture.
Colour
Step 1
Apply colour A to the full head from roots to ends. Develop, rinse, shampoo, neutralist and dry.Step 2
Create five round sections, the first one being over the crown and the lowest one just below the occipital bone. Work on section 2 and 4, starting at the fringe and all around the head, and apply colour B from mid-length to ends to create a light pattern. Leave sections 1, 3 and 5 free of colour. Develop, rinse, shampoo, neutralise and dry.Step 3
Using foils, create a print colour pattern with colours C, D and E on the pre-lightened area. Develop, rinse, shampoo and neutralise.
Style
Step 1
Apply EIMI Velvet Amplifier and EIMI Root Shoot to the roots to create a soft texture, but with volume in the root area. Blow-dry the hair with a medium round brush and over-direct your movement to lift the roots.Step 2
Change to a smaller brush and blow-dry the fringe around to break the straightness.Step 3
Apply EIMI Shape Me and tong the hair with Wella Pro Curl 32mm - using an in-and-out movement to create chunky separation but not a curly finish. EIMI Shape Me's 48 hour shape memory will help keep the created shape in very thick and straight hair. Apply EIMI Rugged Texture from roots to ends everywhere, to add grip and definition to this editorial look and feel.
2. Inspired by Contouring: Ultra Sleek
It's Contouring-Luxe in long, straight hair.
Working on an overall lightened base featuring darker beige panels placed in creative patterns on the bias around the hat line. This will enhance the sleek, movement, narrowing down the shape throughout the mid-length, giving the length diversity, and enhancing the filtered layers of the cut. Straight styling adds to the premium look.
Cut
Step 1
Apply Eimi Perfect Me Hair BB Lotion to wet hair to use as a moisturising cutting lotion. Razor cut the front layers with a slight forward over-direction, for a subtle result.Step 2
Cut concave layers all around the middle parting using texturising scissors.Step 3
Check and texturise the layers by over-directing the hair to the missle parting. Cut with an aggressive forward over-direction to the front fingers at a 45-degree angle. Work this way section by section to create the illusion of length on both sides.
Colour
Step 1
Full-head pre-lightening using colour A about 2cm away from the roots to mid-shaft and 5cm wide. Apply colour B through the end. Develop until the desired level of lift is achieved. Colour the roots with colour A. Develop until the level of lift from mid-lengths to ends is achieved. Rinse, shampoo and neutralise.Step 2
Section the head into 3 parts: from temple to temple, below the hat line, separating the nape area, and around the hat line - leaving a triangle sextion on the top of the head around the middle parting. Apply colour C to the nape area from roots to ends.Step 3
Create a print patter with colours C, D, E and F all around the hat line.Step 4
Apply colour G to the triangle section situated at the top of the head from roots to ends.
Style
Step 1
Apply EIMI Boost Bounce and Light Luminous Reflective Oil and spray EIMI Glam Mist onto wet hair - to create a premium, moldable texture.Step 2
Create the shape with a large round brush and twist the ends.
The NEW Oil Reflections range
Everyone loved the original Oil Reflections Oil so much that Wella decided to develop an Entire Range to compliment it. The New Wella Professionals Oil Reflections will immerse you with a multi-sensorial experience - for results you can SEE, TOUCH and SENSE. Featuring a special blend of Macadamia seed oil, Avocado oil and Vitamin E, known for its natural anti-oxidant properties, this oil instantly reveals the beautiful reflections of your hair colour. This lightweight oil technology conditions the hair and smoothes it to make it feel incredibly light and supple. Ingredients include macadamia seed oil which is used especially for skincare due to its high anti-oxidative virtues, avocado oil is leveraged for its nourishing elements, and Vitamin E, is known for its natural anti-oxidant properties. Now you can try the whole newly formulated regime which includes a shampoo, conditioner and a mask, as well as the original Reflections Oil.
Wella Oil Reflections Luminous Reboost Mask From £9.39
Styling Hero of the Month: Eimi Stay Styled
Hair Care Hero of the Month: Elements Renewing Shampoo
Share


